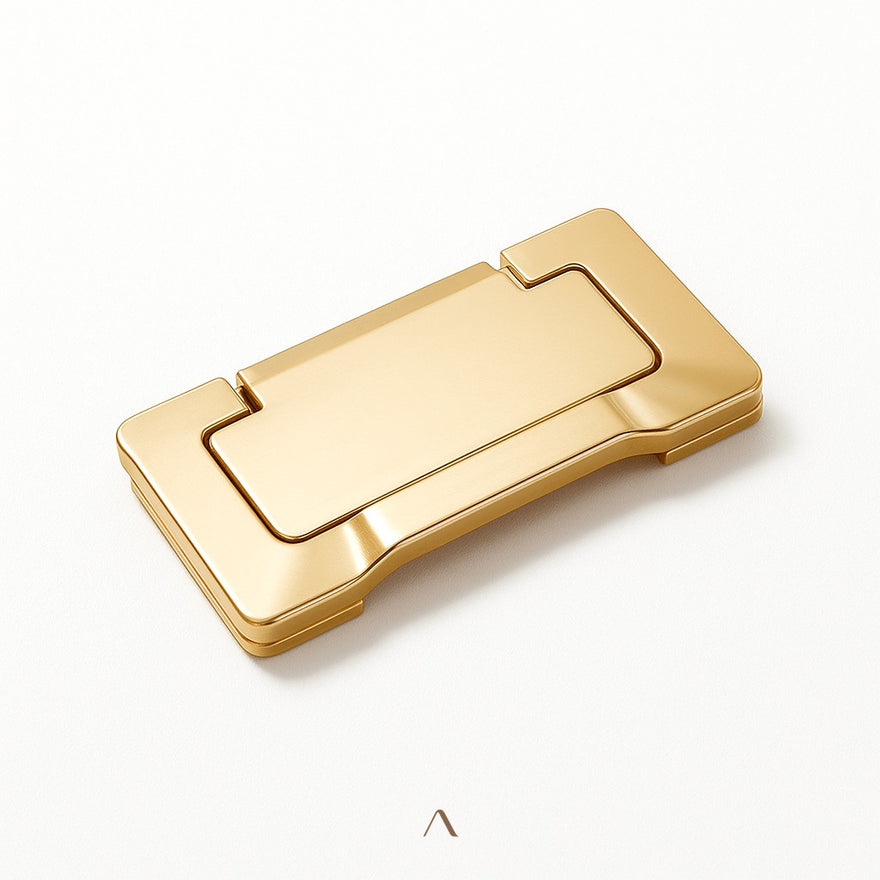


Binderup Pull Bar Brass pull bar, cut with geometric voids.
Coverage that ages—with the piece.
A standard 1-year manufacturer warranty is included with every fixture. Extend to 2, 3, or 5 years of total protection at checkout — and the piece is covered well beyond the install.
- Manufacturing defects — faults in materials or workmanship
- Electrical issues — electrical component failures under normal use
- Finish defects — premature flaking, pitting or discoloration
- Not covered — accidental or physical damage, moisture and corrosion, normal wear and tear, and light bulbs
Every plan covers the same — defects, electrical and finish. Longer plans simply cover for longer. Add-on price scales with order quantity · select your plan in the buy box
- Email our support team at hey@navadecor.co with your claim.
- Provide your order number and a short description of the issue, with photos if helpful.
- Receive a decision within 48 hours. If your claim is approved, we ship a replacement at no cost to you.
Cut through brass—what's removed defines the form
- Solid brass with geometric cutouts — architectural form, real weight in hand
- Ten sizes from 10 cm to 22 cm — fits drawer, cabinet, and wardrobe hardware
- Smooth grip surface — comfortable on daily-use cabinetry
- Works horizontally or vertically — versatile across cabinet configurations
- Brass finish — develops character with use, resists corrosion
Every order is eligible for customization. Frequently requested:
- Adjusted hanging or suspension length
- Custom material finish or paint color
- Modified light emission color or temperature
- Dimmer integration
- Scaled dimensions — larger or smaller
- Complete fixture redesign to your specifications
Complimentary worldwide shipping to 120+ countries. Delivery within 21 business days from your order date.
Need it sooner? Add Priority Processing at checkout to fast-track manufacturing — approximately 10–20 business days to delivery.
14 days from receipt to initiate a return. A 20% restocking fee applies to returns or exchanges not due to defect or damage. To start a return, email hey@navadecor.co.
A standard 1-year manufacturer warranty is included. Extend to 2, 3, or 5 years total coverage at checkout.
- Manufacturing defects — faults in materials or workmanship
- Electrical issues — electrical component failures under normal use
- Finish defects — premature flaking, pitting or discoloration
- Not covered — accidental or physical damage, moisture and corrosion, normal wear and tear, and light bulbs
- Contact our support team via email.
- Provide your order details and a description of the issue.
- Receive a decision within 48 hours. If approved, we ship a replacement at no cost to you.
Geometric voids—precision-cut into solid brass


Full brass construction — weighty, warm, and built to develop a patina with daily use.
From 10 cm pocket pulls to 22 cm wardrobe handles — one design across the full cabinet run.
Install horizontally on drawers or vertically on tall cabinet doors — the geometry works both ways.
Solid brass throughout — the bar, the geometric cutouts, and the screw posts are all brass. There's no zinc core or plated surface; the material you see is the material all the way through.
The geometric cutouts — precision-cut through the bar rather than added as surface decoration. The negative space is the design, and it gives the pull an architectural quality that reads as deliberate rather than decorative at any distance.
Yes — brass holds up well in kitchen environments. The smooth grip surface is easy to wipe clean, and the finish develops a warm patina over time rather than showing wear marks.
Yes. The smooth bar profile sits comfortably across the fingers with a solid weight that makes drawers and doors feel substantial to open — not flimsy or lightweight like a stamped pull.
Yes — sizes G through J (14–22 cm) are particularly suited to wardrobe doors and tall cabinet panels. The hole spacing options ensure you can match existing or planned hardware drilling patterns.
Modern, Art Deco, and minimalist interiors are the natural fits — the geometric cutouts reference architectural pattern without being ornamental. It also works in transitional kitchens or bathrooms where brass hardware adds warmth to a clean design.
Yes — standard through-hole installation with two machine screws. Drill to the hole spacing for your chosen size, pass the screws through the cabinet door or drawer front, and tighten from the inside. No specialist tools required.
Solid brass naturally resists corrosion — it doesn't rust and holds its surface integrity in humid environments like kitchens and bathrooms. The finish will develop a patina over time, which most people find adds to its character.
Yes — the geometric design reads clearly in both orientations. Horizontal on drawers, vertical on tall cabinet or wardrobe doors. The hole spacing is specified per size so you can plan the drilling accordingly.
Yes — reach out to us with your project scope and we'll discuss quantities, lead times, and any relevant options. We work with interior designers and contractors on full-room and multi-room hardware packages.
Design professionals, this one's for you.
Access trade pricing, priority sourcing, and a dedicated account manager. Built for interior designers, architects, and developers procuring at scale.